

Configuring a Proxying proxy in Google Chrome is important for users who want better privacy, manage multiple accounts, or perform web scraping tasks. However, unlike some other browsers, Chrome doesn’t have built-in proxy settings; it relies on your system’s network configuration.
Once configured, Chrome routes its traffic through the selected proxy server automatically. This guide explains how to configure it correctly and how to solve common connection issues.
How Chrome Uses Proxy Settings on Windows
Unlike some browsers that manage proxies independently, Google Chrome uses the proxy settings configured in Windows. Any proxy changes made at the system level are automatically applied to Chrome.
This approach simplifies setup because you only need to configure the proxy once. However, it also means other applications on your device may use the same proxy connection unless they have separate network settings.
Understanding the behavior is important because issues with Windows proxy configuration will directly affect Chrome’s connectivity.
Why Use a Proxy in Chrome?
A proxy acts as an intermediary between your device and the website you visit. When used in Chrome, it helps hide your real IP address, secure your browsing activity, and allow access to geo-restricted content.
Many users rely on proxies for tasks like managing multiple accounts, web scraping, and testing applications from different locations. It also improves privacy by routing your traffic through secure servers, reducing the risk of exposure.
Using a proxy gives you more control over how websites interact with your network, making it an essential tool for both casual users and professionals.
What You Need Before Configuring a Proxy
Before starting the setup process, you need valid proxy credentials from your provider. Most providers supply a proxy IP address, port number, username, and password (if authentication is enabled). Without these details, Chrome will not be able to establish a connection through the proxy server.
It is also important to know which proxy protocol you are using. Most providers support HTTP, HTTPS, or SOCKS5 proxies. Chrome on Windows works well with all three when properly configured.
How to Configure a Proxying Proxy in Chrome on Windows
Start by opening Chrome on your Windows system.
Click the three-dot menu in the upper-right corner of the browser window and open the Settings page.
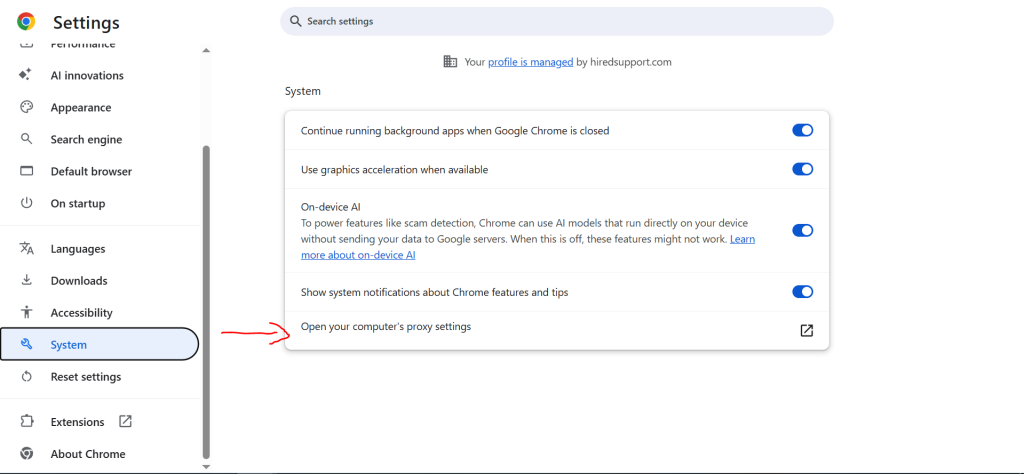
Scroll down until you find the System section, then click “Open your computer’s proxy settings.”
This opens the Window proxy configuration panel.
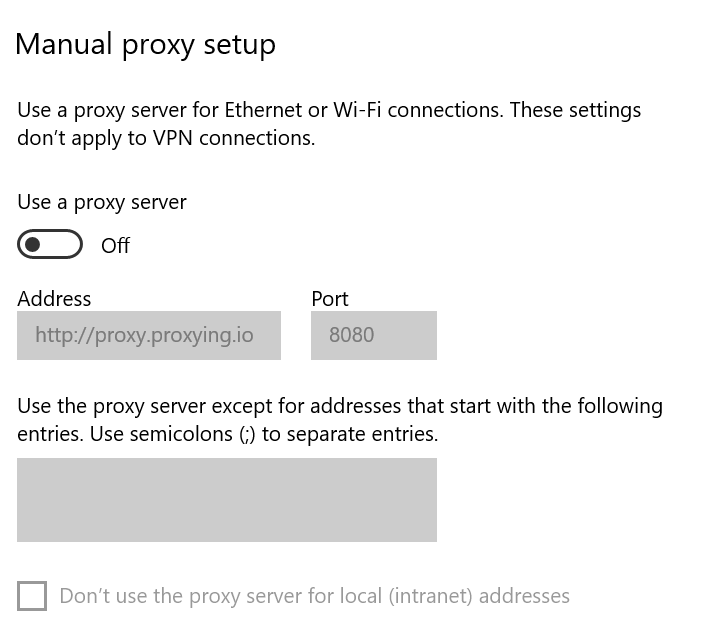
Select Manual Proxy Configuration
Enable the option to set up a proxy manually. This allows you to enter proxy server details. Manual configuration gives you control over how your internet traffic is routed and which proxy server is used.
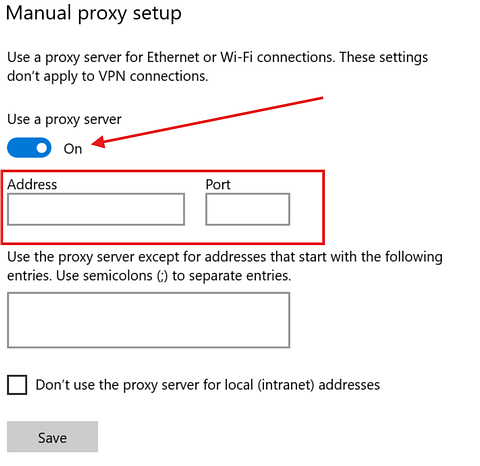
Enter Proxy Credentials
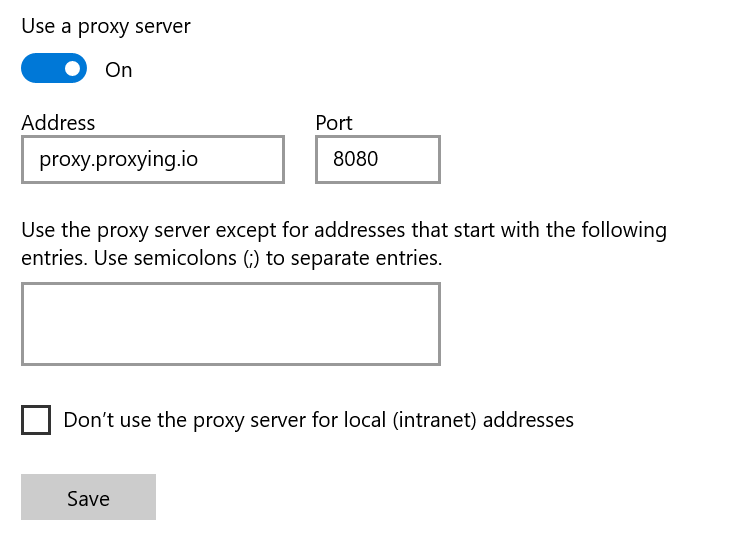
Input the proxy details provided by your proxy provider.
- IP Address (Host): The proxy server address
- Port: The assigned port number
- Username/Password: If authentication is required
Make sure all details are entered correctly. Incorrect information can prevent the connection from working.
Save Settings and Restart Chrome
After entering the proxy details, save the settings and close the windows. Restart Chrome to ensure the new configuration is applied properly. This helps avoid connectivity issues and ensures all traffic is routed through the proxy.
Verify Your Proxy Connection
To confirm Proxying’s proxy is working, visit an IP-lookup website. If the displayed IP address matches your proxy instead of your real IP, the setup is successful. This setup ensures your traffic is being routed correctly.
Conclusion
Opera provides a simple and effective way to use proxies through system-level settings. While it does not offer a built-in proxy configuration panel like some browsers, its integration with system settings makes the process straightforward.